Disney Bleach-Dyed Shirts to Rock Your #DisneySide
This post contains affiliate links. Please see my disclosure policy for details.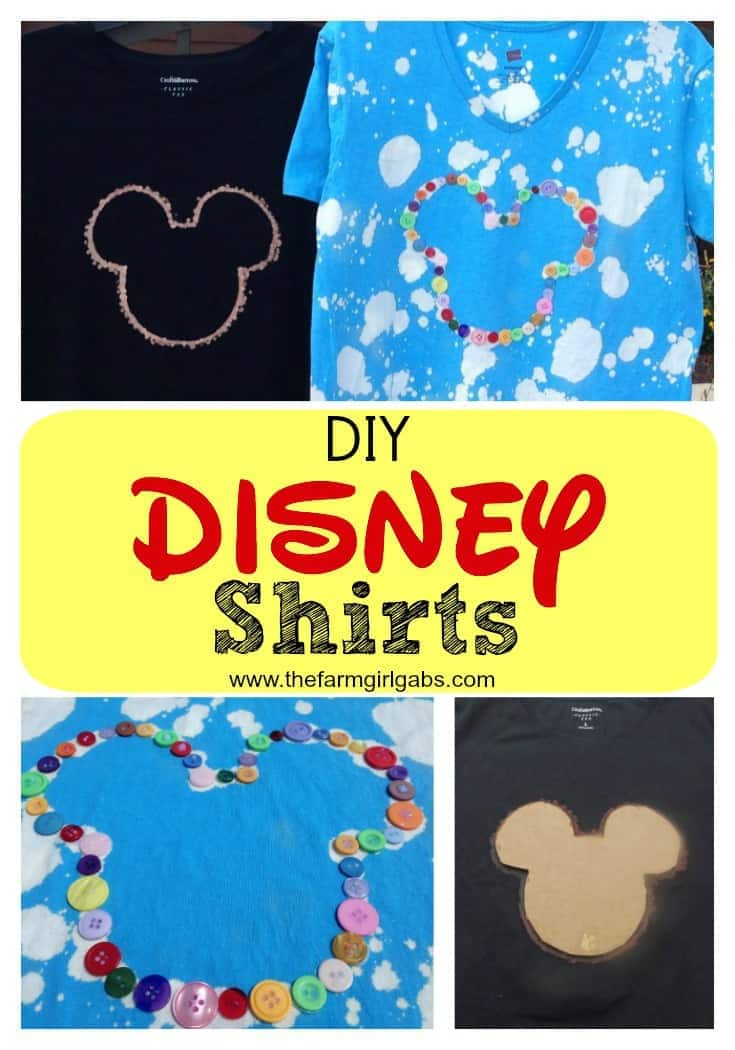 Looking for a fun and easy way to rock your #DisneySide? These Disney bleach-dyed shirts are inexpensive and easy to make. My Disney apparel and merchandise is something near and dear to my heart. Here are a few inexpensive Disney shirts I created simply by using bleach, a cotton swab and some buttons for embellishment. Why not carry that pixie dust and magic around with you all the time? They are also great to make if you are planning a family vacation to one of the Disney Parks. Then, your whole family can match.
***Before you start this project, please protect your work area. You will be using bleach and you certainly do not want to ruin anything the bleach comes in contact with.  Supplies Needed for the Disney Bleach-Dyed Shirts to Rock Your #DisneySide
Relax Fit Jersey V-Neck Tee
Mickey Mouse silhouette (click here to print out)
Cardboard – large enough to fit inside the shirt or shirts
Bleach
Cotton Swabs
Toothbrush
Bright Colored Buttons
Aleene’s Jewel-It Embellishing Glue
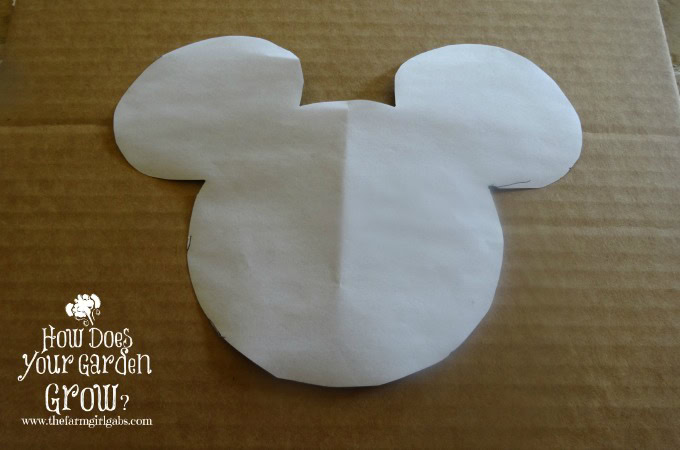
First, you will need to cut out a silhouette of a Mickey head. I found one on the internet and enlarged to the size I needed. Trace the silhouette onto a piece of cardboard and cut out.
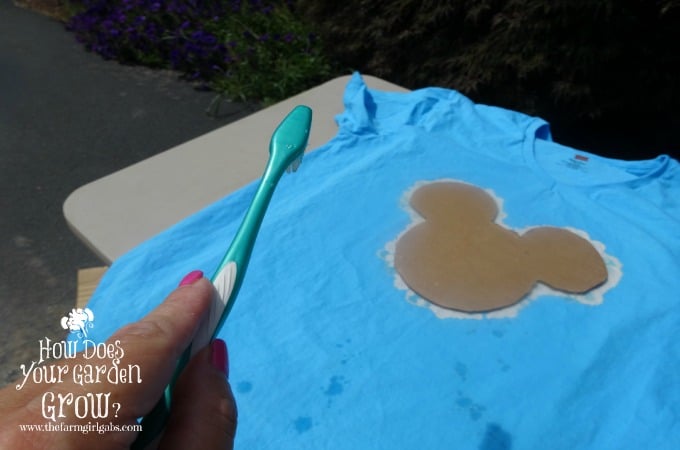
 Lay your shirt flat on your work surface. Place a large piece of cardboard inside your shirt so the bleach does not run through and ruin the backside. Center the Mickey onto your shirt. Dip your cotton swab in your cup of bleach and dab bleach around outside edges for the cutout.
 Once I finished bleaching the edges of the Mickey cutout. I dipped a toothbrush in the bleach and splattered over shirt. This step is optional. As you can see, I decided to keep the black shirt more simplified.
 Once the shirt is dry, I outlined the Mickey silhouette in buttons. You can use any type of embellishment you want. I just happen to have a whole jar full waiting to be used for something. Use embellishing glue to “glue” the buttons onto the shirt. Let dry for one hour.
 This project is quick and super simple. Aside from the embellishing step, the entire project only takes about 20 minutes. How’s that for a quick way to help your rock your #DisneySide! So, go ahead! Show me how you rock your #DisneySide! I’d love to see it! I can’t wait to see your creations.
Looking for some more Disney inspiration? Be sure to follow my Disney Love! Pinterest Board for lots of Disney Fun!
Follow Melissa Russo | The Farm Girl Gabs’s board Disney Love! on Pinterest.


3 Comments