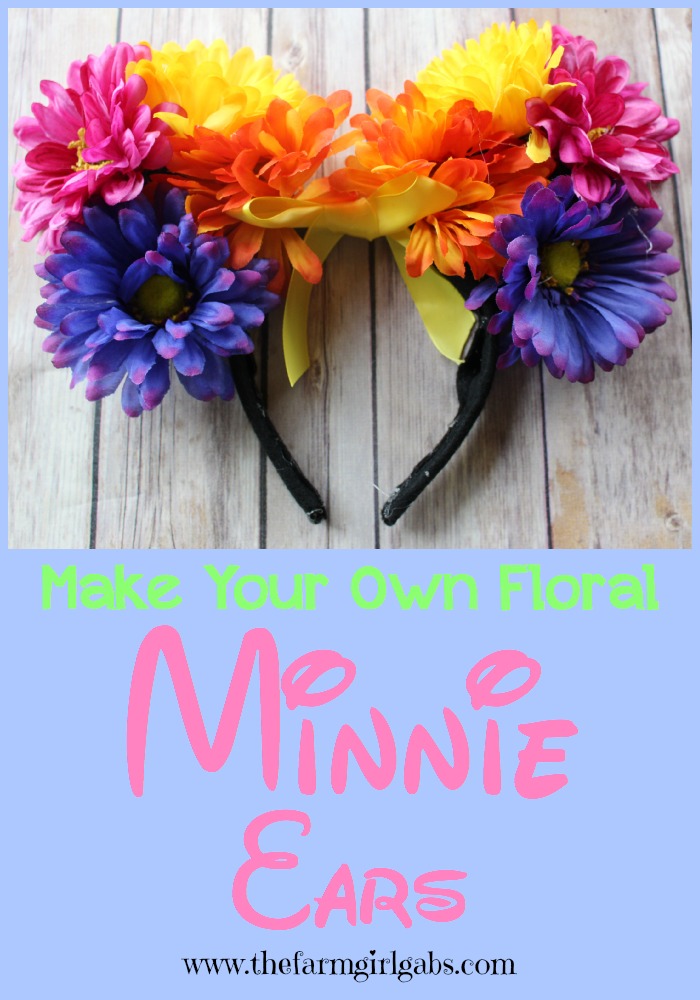
Make Your Own Floral Minnie Ears
This post contains affiliate links. Please see my disclosure statement for details.
I received some really awesome Pixie-Dusted email last week from Disney and MomsSelect informing me that I have been selected to host a Disney Side @ Home Celebration. What does this mean, you ask? It means I will be doing something that I love to do every day — proudly sporting my #DisneySide by hosting a Disney-themed party for a group of my daughter Gabrielle’s girlfriends. I plan on sharing all the details with you in a series of blog posts over the next month including some creative Disney-inspired recipes as well craft ideas that you can use to create your own #DisneySide @ Home Celebration.
When it comes to expressing my love for all things Disney, those that know me well, know that I love to show my #DisneySide every chance that I get. Earrings, shirts, hats, EARS, yes, Ears!!! A trip to any of the Disney Parks is not complete without a pair of Mickey or Minnie ears to top off your outfit and rock your #DisneySide. When I found out I was hosting this party, I started brainstorming ideas on what a group of teenage girls would love. I found this really cool tutorial on the Disney Style site on how to Make Your Own Floral Minnie Ears.
For the party, the girls will be creating their own as one of the fun crafts I have planned, but I thought I would show you in advance how easy it is to do. An outfit worn at any of the Disney Parks is not complete until you wear your Minnie Ears!
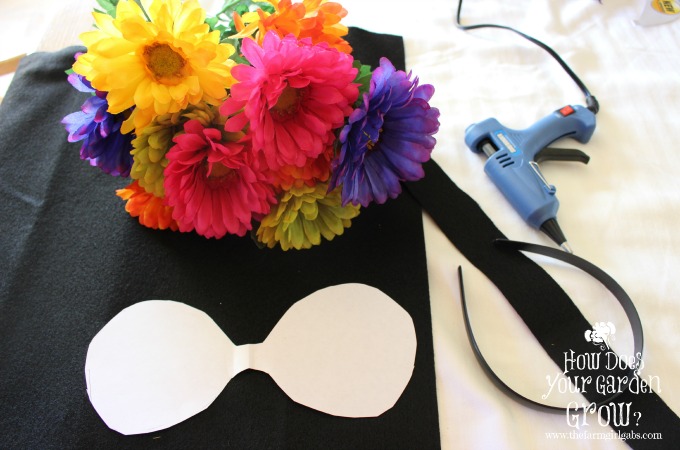
Materials needed:
1/2 inch Black Plastic Headbands![]()
![]()
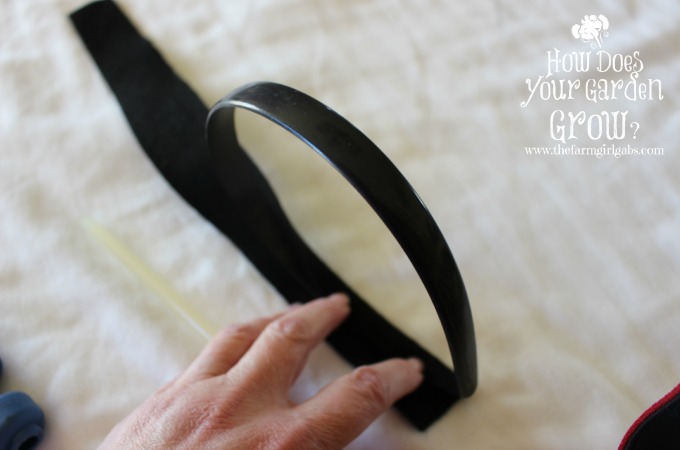
I began by cutting a 2″ wide x 18″ long piece of black felt. Using a glue gun, I adhered the felt to the plastic headband.
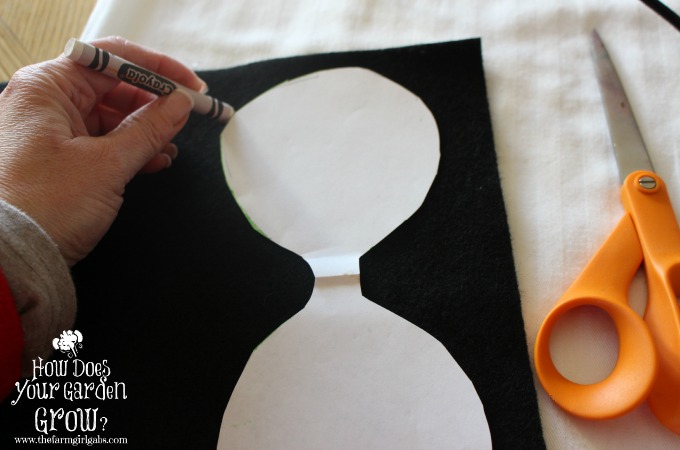
I then traced a two sets of ears (Click here for the template) onto the black felt and cut them out.
Now, you need to trace a circle, a little smaller than the size of each ear, on the foam.
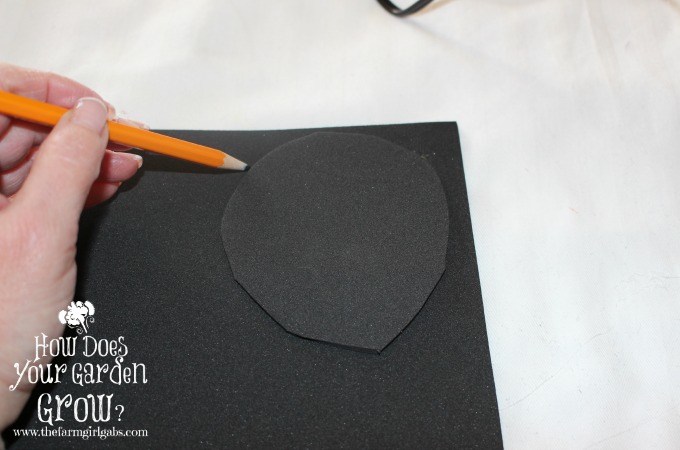
Cut that out and assemble the felt ear with the foam circle inside. Glue together and bring the other side of the ear to close.
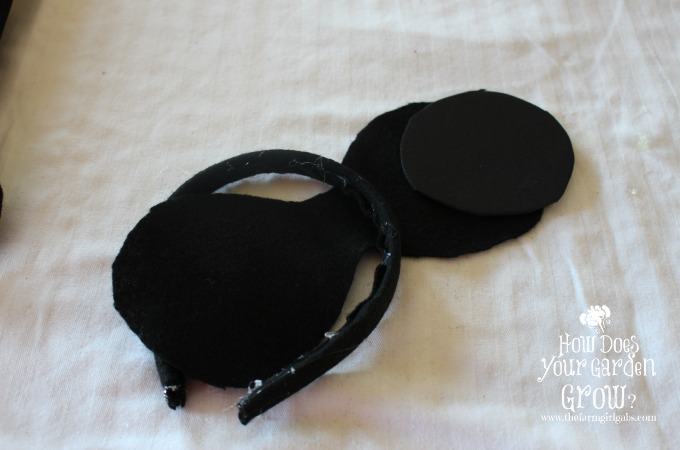
Make sure your glue it well. Do the same for the other ear.
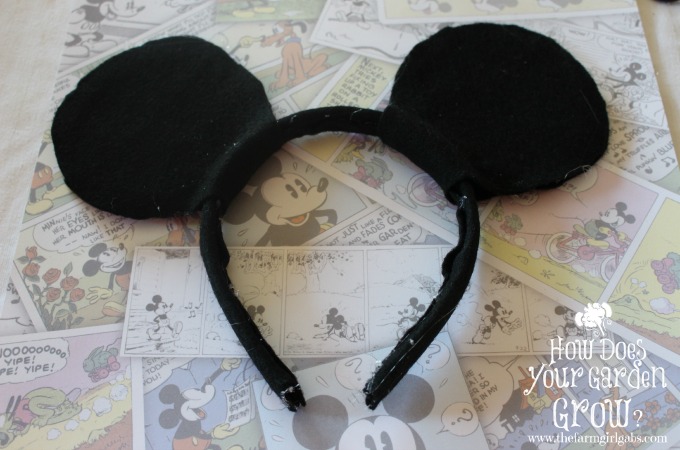
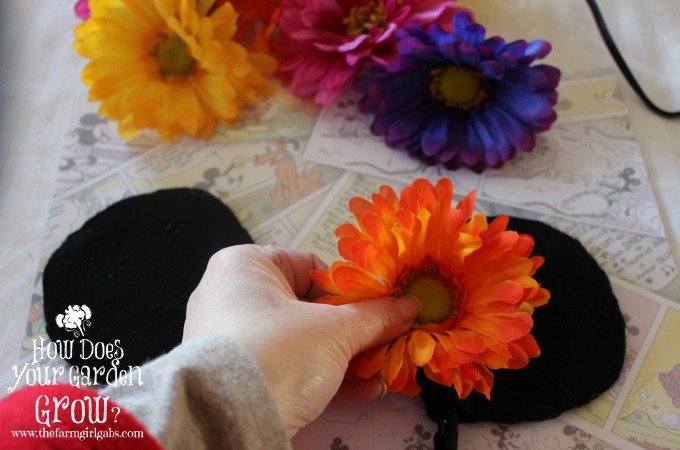
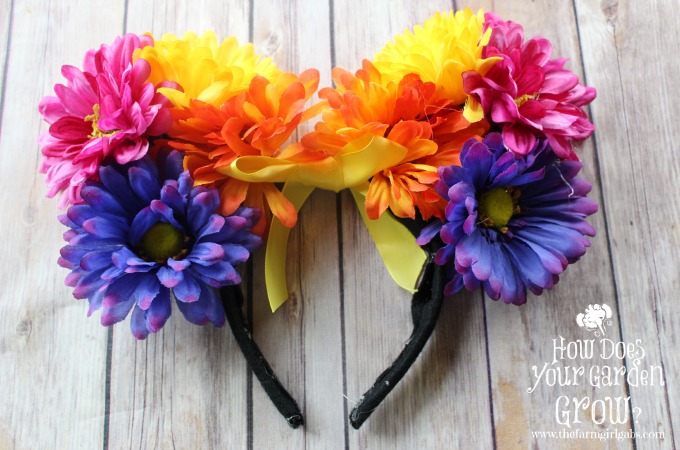
Once you completed the basic Minnie Ear, you can now start glueing on the cut silk flowers. Have fun with it. I love color, so I made these extra bright. Don’t forget to add a pretty bow to the center when you are finished. Minnie ALWAYS has a pretty bow in her hair.
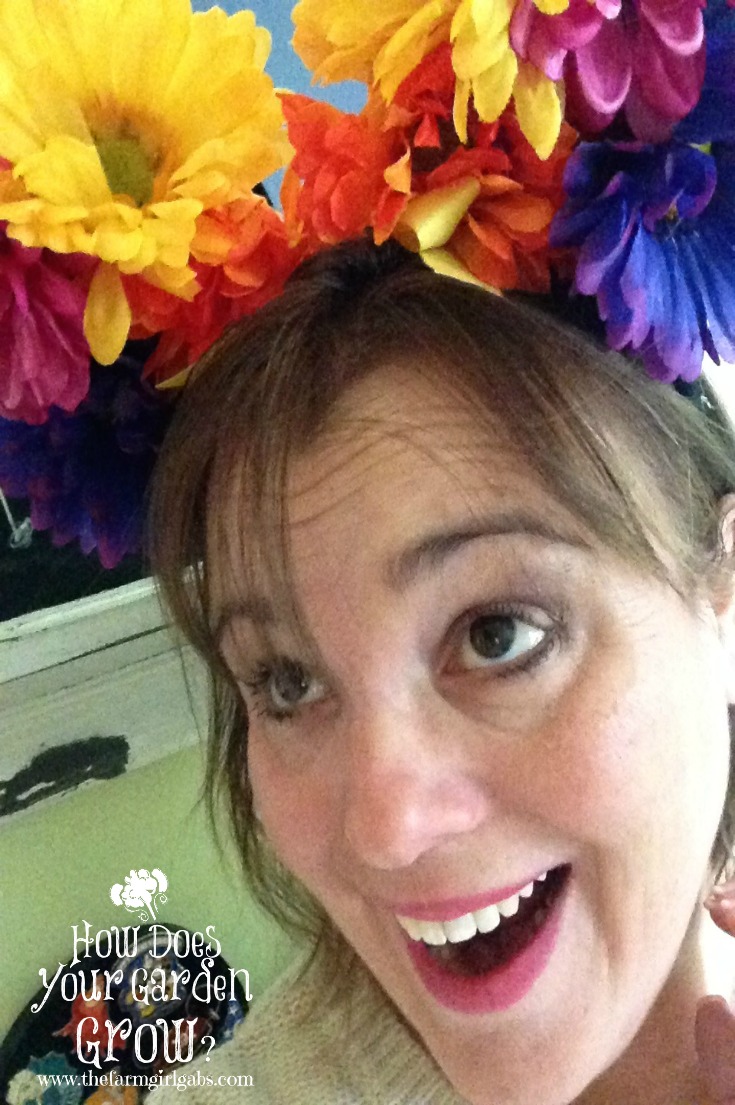
Now isn’t the purdy! It’s so much fun to show off your #DisneySide.
I can’t wait to wear these on my next vacation to Walt Disney World. How do you like to show your Disney Side? Leave me a comment below. I would love to know.
Need some more Disney Side at Home Celebration ideas? Be sure to follow my DisneySide at Home Celebration Pinterest Board below. You can also follow all the fun on my Twitter, Facebook or Instagram accounts by searching for #DisneySide.
I was selected by Disney, MomSelect and BSM Media to host a #DisneySide at Home Celebration. I received free products in order to host a this party. As always, opinions expressed here are my own.


So cute! What a fun party idea!! I’m pinning in case my two year old decides she wants a Minnie party this year 🙂
So cute! I love vibrant pretty flowers. This is a great kids craft idea.
Thank you so much for sharing your post on Bloggers Brags Pinterest Party #62. I’ve pinned your post to our Pinterest board.
These are so darn cute! I can totally imagine a little girl loving these!
Hi. I’d like to know how the back of your floral ears look. Are there flowers on the back of the ears as well or just black? Want tomake them but don’t know what to do with the back of the ears. Thanks!
The back of the ears I created are just black felt. I did not glue flowers on the back of the ears. But, feel free to get creative when you make yours. Happy crafting!