Disney The Little Mermaid Pumpkin
Dinglehoppers, Snarfblatts and this DIY Disney The No-Carve Little Mermaid Pumpkin are the perfect way to celebrate Halloween!

This post contains affiliate links. Please see my disclosure policy for details.
Look at this stuff. Isn’t it neat? While you may not totally be in the mood for a Disney-inspired pumpkin today, I am in full Halloween mode behind the scenes here at The Farm Girl Gabs (even though it is August).
It’s hard. Really, it is. We are still enjoying the last few weeks of summer vacation and here I am decorating a series of Disney-inspired Pumpkins. First up is this Little Mermaid Pumpkin. Look at this stuff, isn’t it neat? I just love how she turned out.
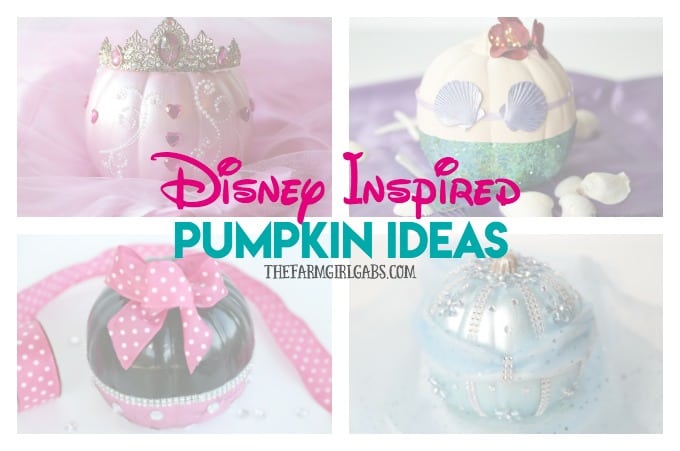
This Disney pumpkin obsession started last year for me when I shared how to make a Minnie Mouse pumpkin and a Cinderella pumpkin. Next to Rapunzel, Ariel is a favorite Disney princess of mine. I just love her spunk….and her collection. This Little Mermaid pumpkin is pretty easy to make. It just takes some patience in waiting for the paint to dry. I hate that part.

What supplies do I need to make a No-Carve Little Mermaid Pumpkin?
- White craft pumpkin
(I purchase a whole bunch on clearance at the end of last season.)
- Flesh
colored paint
- Teal Pearlized
Paint
- Lavender Pearlized Paint
- Modge Podge
- Paint Brushes
- Teal Chunky Glitter
- Green Chunky Glitter
- 2 Shells
- Lavender Ribbon
- Glue Gun
& Glue Sticks
- Painters Tape

How Do I Make A No-Carve Disney Pumpkin?
Before you get started, use some painters tape and mark out half of the pumpkin. Start by painting the top half of the pumpkin with the flesh color paint. Let dry and apply another coat.
Paint the bottom with the pearlized teal paint. Dry completely. You will only need one coat since it will be glittered to represent Ariel’s fins.


Now my favorite part – the glitter! Paint the bottom half (the part you just painted teal) with Mod Podge
. Sprinkle both the teal and green glitter over. Let dry.

While the glitter is drying, give the seashells few coats of lavender paint. Let dry. Cut a piece of ribbon to fit around the middle of the flesh part of the pumpkin. Glue in place. Then secure the seashells with glue too.

My glitter obsession was on overload with this project. I LOVE how Ariel’s fins turned out. This is a fun project for both kids and adults. Be sure to check out the rest of my Disney-inspired Pumpkin series. I am hoping to share a few more down the line too – I think a Disney Villan would be fun.
Happy Disney Crafting!
Try These Other Fun Disney No-Carve Pumpkin Ideas
Save this No-Carve Disney Pumpkin Craft for Later. Pin this DIY Little Mermaid Pumpkin To Your Favorite Pinterest Board.


No-Carve Disney Little Mermaid Pumpkin
Dinglehoppers, Snarfblatts and this DIY Disney The Little Mermaid Pumpkin are the perfect way to celebrate Halloween! Kids will love making this no-carve Disney pumpkin. This is a fun craft that Little Mermaid fans will love to create. This Disney pumpkin is an easy craft project for fall.
Materials
- White craft pumpkin
- Flesh-colored paint
- Teal Pearlized Paint
- Lavender Pearlized Paint
- Modge Podge
- Paint Brushes
- Teal Chunky Glitter
- Green Chunky Glitter
- 2 Shells
- Lavender Ribbon
- Glue Gun & Glue Sticks
- Painters Tape
Instructions
- Before you get started, use some painters tape and mark out half of the pumpkin. Start by painting the top half of the pumpkin with the flesh color paint. Let dry and apply another coat. Paint the bottom with the pearlized teal paint. Dry completely. You will only need one coat since it will be glittered to represent Ariel’s fins.
- Paint the bottom half (the part you just painted teal) with Mod Podge. Sprinkle both the teal and green glitter over. Let dry.
- While the glitter is drying, give the seashells a few coats of lavender paint. Let dry. Cut a piece of ribbon to fit around the middle of the flesh part of the pumpkin. Glue in place. Then secure the seashells with glue too.

Thank you for sharing. I will attempt this for a work contest and let you know how the copy cat version turn out.
Thank you for sharing! I will try to replicate this, for a work pumpkin contest and let you know how the copy cat version turns out.
Good luck!!!
mes3525rttyneg mG1hXdr 3YX6 7TG0VgA
Thank you for your sharing. I am worried that I lack creative ideas. It is your article that makes me full of hope. Thank you. But, I have a question, can you help me?
MERTYHRTHYHT1534113MARETRYTR
This website definitely has all of the information I wanted concerning this subject and didn’t know who to ask.
Your account has been dormant for 364 days. To stop deletion and claim your balance, please log in and request a withdrawal within 24 hours. For help, join our Telegram group: https://t.me/s/attention6786742
Your account has been dormant for 364 days. To avoid deletion and claim your funds, please access your account and request a payout within 24 hours. For help, connect with us on our Telegram group: https://t.me/s/attention567564
Your account has been inactive for 364 days. To avoid removal and claim your balance, please sign in and initiate a withdrawal within 24 hours. For support, visit our Telegram group: https://t.me/s/attention567563
Because the admin of this website is working, no doubt very soon it will be famous, due to its quality contents.
Can you be more specific about the content of your article? After reading it, I still have some doubts. Hope you can help me.
také jsem si vás poznamenal, abych se podíval na nové věci na vašem blogu.|Hej! Vadilo by vám, kdybych sdílel váš blog s mým facebookem.
Additionally, an ergonomic design and user-pleasant options comparable to adjustable settings can contribute to a comfortable and satisfying typing expertise, in the end rising total satisfaction with the electric typewriter.
There is definately a lot to know about this topic. I love all of the points you’ve made.
Hello there! This post could not be written any better! Reading through this post reminds me of my previous roommate! He continually kept preaching about this. I’ll send this post to him. Pretty sure he’ll have a good read. Thank you for sharing!
Hello there! I could have sworn I’ve visited your blog before but after going through a few of the articles I realized it’s new to me. Anyways, I’m definitely pleased I found it and I’ll be bookmarking it and checking back frequently!
Znáte nějaké metody, které by pomohly omezit krádeže obsahu? Rozhodně bych ocenil