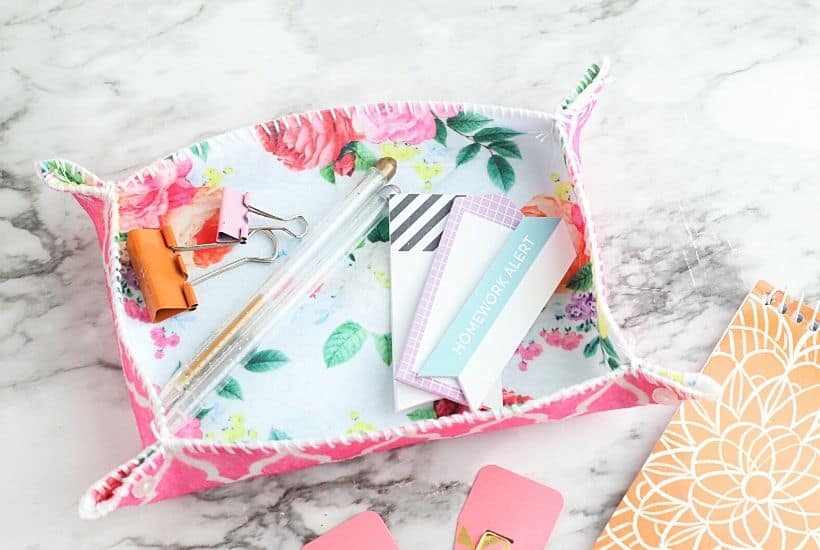
DIY Fabric Tray


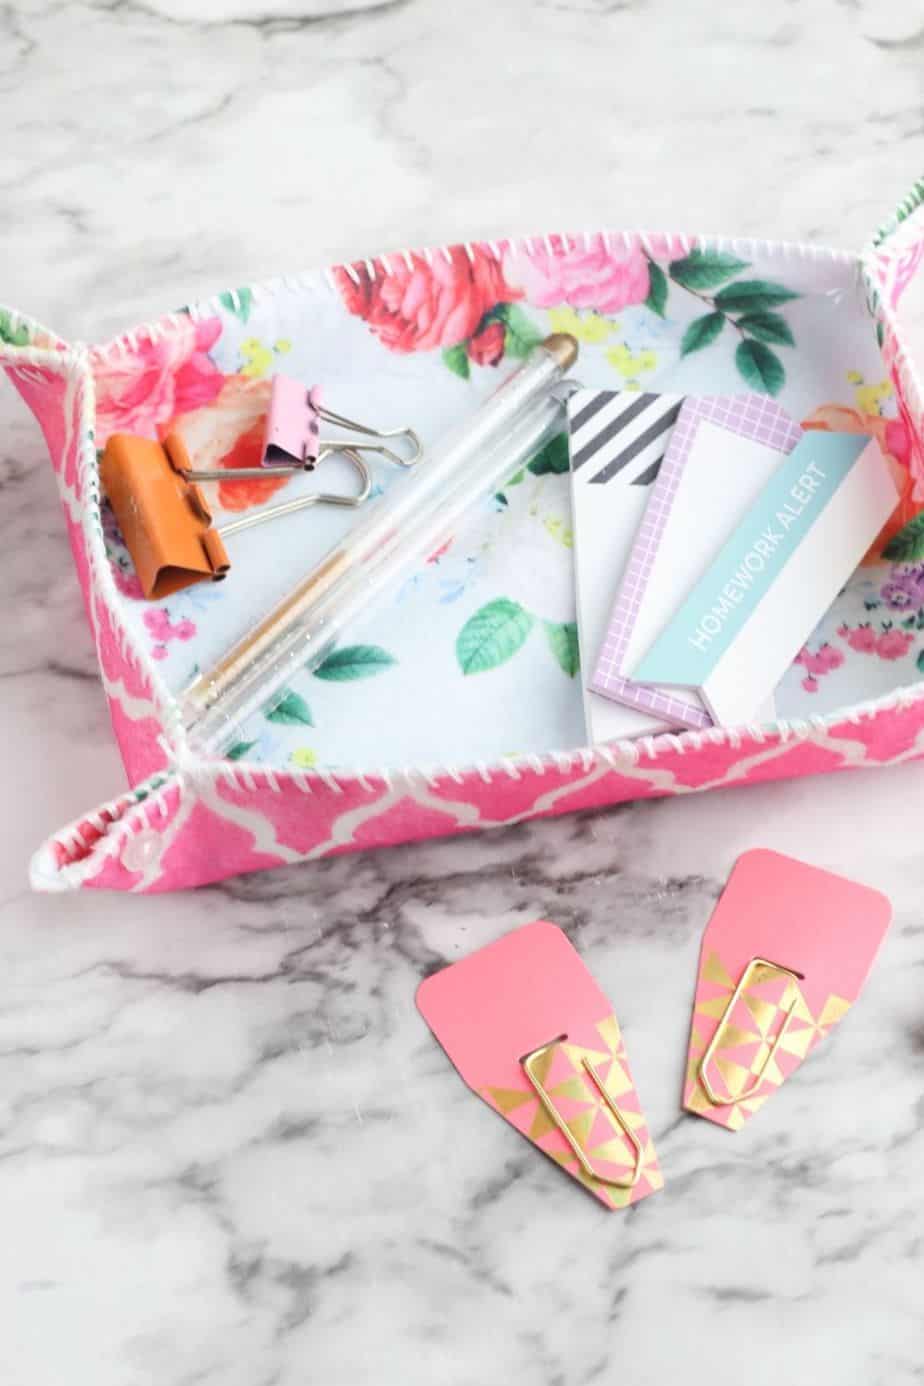
This simple DIY fabric tray is a fun sewing project you can make in just a few minutes. This easy craft project is perfect to display on your desk and use for home organization.
This post may contain affiliate links. We may receive a commission if you click and purchase something. Please see our disclosure policy for more details.
Keeping your home neat and organized doesn’t have to be difficult. In fact, if you enjoy sewing, you can have some fun creating your own storage baskets and trays! This simple DIY fabric tray is a fun sewing project you can make in just a few minutes.
Place it on your desk or console table to add a pop of color and keep the space organized at the same time.
Free Craft Printable! Click here to download.

Here is how to Make A Fabric Desk Organizing Tray
DIY Fabric Tray Supplies
Making this simple project only requires a handful of supplies. And if you’re a sewer, you probably already have everything you need at home right now. To make this easy sewing project, you’ll need:
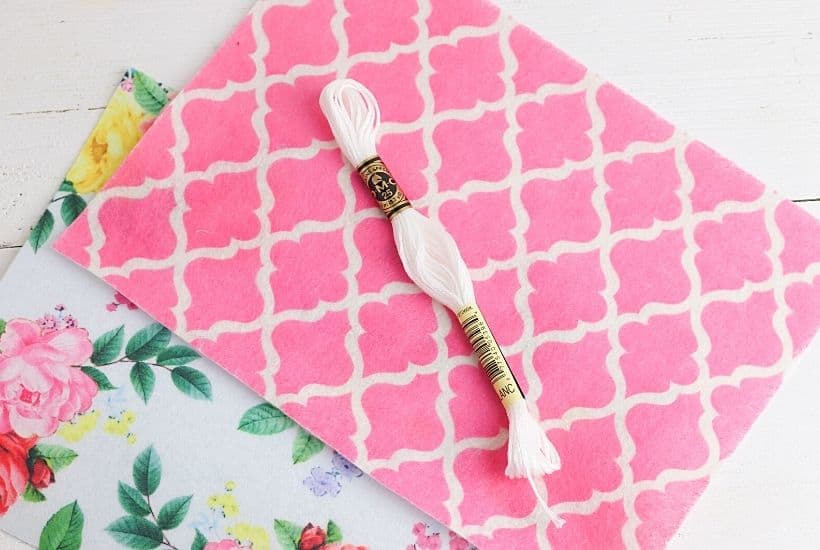
- Patterned or solid felt: Felt is the best choice for this DIY tray because it’s thick and sturdy. Use patterned felt to dress up the tray or make it with solid felt to create a more versatile look for your storage tray.
- Embroidery thread and needle: Since felt is thicker than traditional fabric, you’ll need a thicker thread to make this tray. Using embroidery thread and an embroidery needle will ensure you create a strong, sturdy stitch to hold your felt tray together.
- Buttons: Dress up the corners of your fabric tray with the help of buttons. Choose buttons in a coordinating color to decorate each corner of your tray.
How Do You Make a Fabric Tray?
Even a beginning sewer could make this craft because it’s so simple to put together! The first step is to decide how big you would like your tray to be.
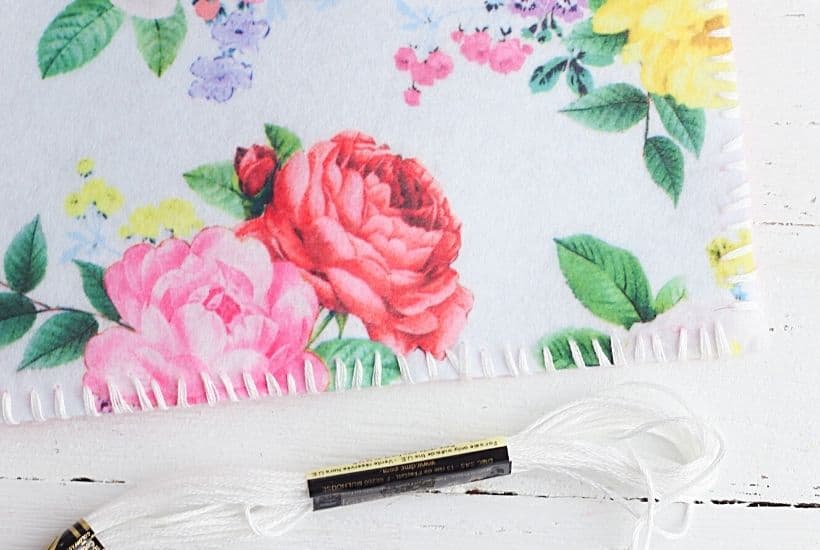
Trim the felt as needed until it’s the size you want, then place the two pieces of felt on top of each other with the patterned side facing out.
Decide which pattern you want to be on the inside of your tray, then place that pattern on top. Thread your needle and tie a knot at the end of the string. Pull the thread through the felt so that the knot is on the top in one corner of the fabric.
Loop the thread around the outside edge to sew the two pieces of felt together. Continue looping until all edges of the fabric has been sewn together, then knot the thread in the top corner.
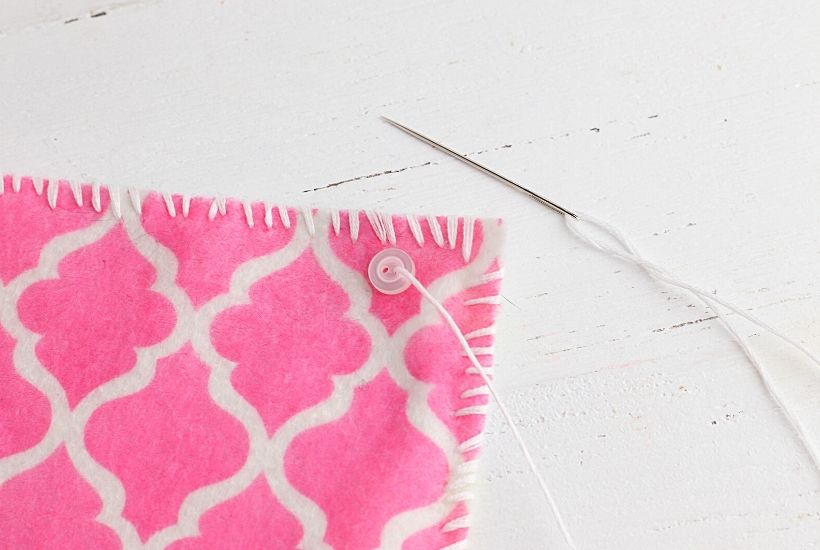
Flip your fabric over so the bottom pattern is now on the top. Place one button on the corner of the tray, offset to one side. Pull your thread through the button, then pinch the two sides of the fabric together at the corner.
Push the needle through the other side of the fabric and sew the button onto the corner. Repeat the process on each corner to finish making your fabric tray.
When you’re finished sewing your tray, you can use it on your nightstand, desk, or entry table to easily organize small items in one handy place.
Try These Home DIY Craft Projects
Super Dad Mug (Easy Cricut Craft)
Save this DIY organizer for later. Pin this Fabric Tray craft to your favorite Pinterest board.


DIY Fabric Tray
Materials
- 2 pieces of patterned felt
- Embroidery thread
- 4 small buttons
Tools
- Embroidery needle
- Scissors
Instructions
- Trim the felt to the size you would like your tray to be.
- Line the pieces up with both patterns facing outward.
- Sew the pieces together by looping the embroidery thread over the edge of the fabric.
- When the pieces have been sewn together around each edge, place a button on the side of one corner and thread the needle through. Pinch the sides of the corner together and sew the button on, threading the needle through each side of the corner to hold it together.
Repeat the process on each corner.


Поиск в гугле