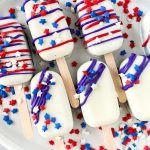
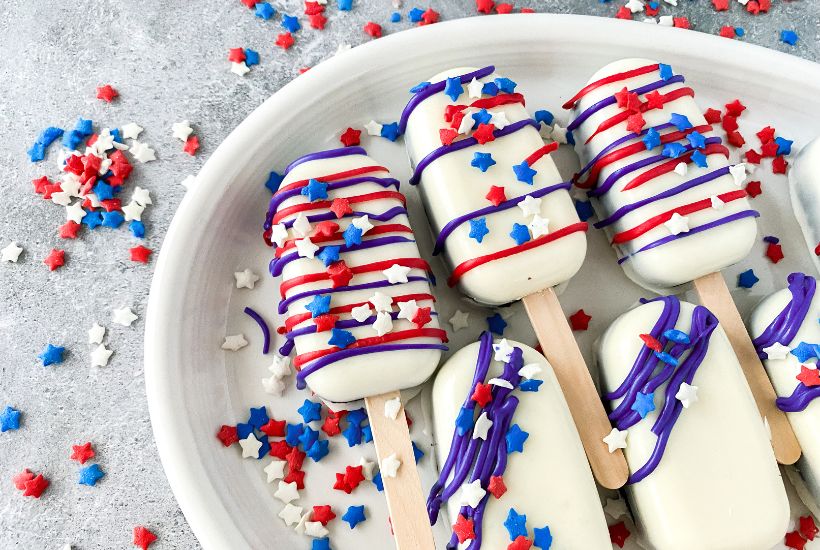
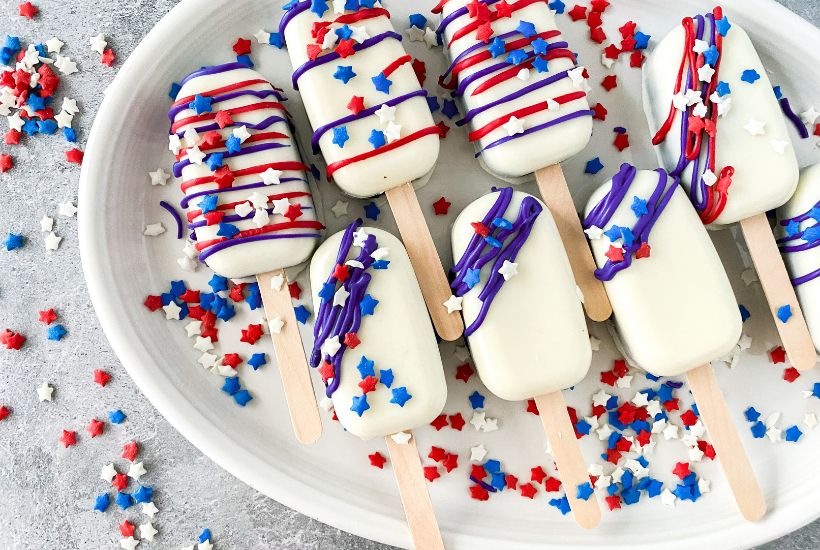
Red, White & Blue Cakesicles


Feeling festive and looking for the perfect treat to prepare for the holidays? Try these tasty and fun Red, White & Blue Cakesicles that are sure to be a huge hit at any gathering you host with your family and friends. Follow this easy step-by-step guide to teach you how to make your own cakesicles. These are a fun kid-friendly food too.

This post may contain affiliate links. We may receive a small commission if you click and purchase something. Please see our disclosure policy for more details.
Tired of making the same usual cookies and cupcakes for family gatherings? If so, you can impress your guests with these Red, White & Blue Cakesicles. They have a sweet taste with the perfect slightly moist center that you can enjoy with each bite. This easy patriotic dessert not only tastes good, but these sweet treats are also different from your usual snack food, making them an excellent, most impressive choice for any party or get-together.
What Are Cakesicles?
Cakesicles are similar to cake pops, but they’re shaped more like popsicles, which is where they get their adorable name. It’s like having a candy-coated cupcake on a stick. The outside of the cakesicles is slightly hard but easy to bite through and the center is soft, with a melt-in-your-mouth type of texture that will have you wanting more as soon as you finish your first one.


How To Make Cakesicles – The Baking Essentials
Making the Red, White & Blue Cakesicles is fun and simple, but you need to have specific ingredients and equipment, including:
- Candy Melts – They’re definitely the star of the show. You’re going to dip your prepared cake mixture into the flavorful candy melts, so you absolutely need to have them.
- Sprinkles – You can add extra appeal to the cakesicles by adding sprinkles to both sides of them.
- Ice Cream Silicone Molds – These molds will help you create the perfect cakesicles. If you don’t have the molds, you can get them on Amazon.
- Popsicle Sticks – Of course, you need to have something to stick these pops on, so be sure to grab some popsicle sticks.
Along with these ingredients and equipment, you should also have parchment-lined baking sheets, piping bags, microwave bowls with lids, coconut oil, and the cake pop dough recipe, with all the ingredients needed to prepare the dough for these sweet treats.
What type of cake should I prepare for these cakesicles?
Use any flavor your heart desires, whether you’re a chocolate lover or someone who prefers something along the lines of vanilla or strawberry. Use any kind of cake mixture you’d like to prepare the batter for these sweet treats.
What can I do if I don’t have piping bags?
If you don’t have piping bags, pour your melted candies into their own Ziploc storage bag, seal it shut while removing the excess air, and then cut a tip on the corner. You can conveniently use the food storage bag as your piping bag.
Can I add a milk chocolate coating to these cakesicles instead of white chocolate?
Absolutely. However, I believe the red and blue colors stand out better on the white surface, and it goes better with the red, white, and blue theme that you might be trying to achieve when making these for an important holiday, such as July 4th or Memorial Day.
Get ready to impress your family and friends with these tasty cakesicles. They’re sweet, easy to prepare, and absolutely delicious enough to keep everyone coming back for more.
Kitchen Essentials Needed To Make Cakesicles
More Patriotic Red, White & Blue Recipes To Try
Red, White & Blue Brownie Pizza
Stars & Stripes Dipped Pretzels
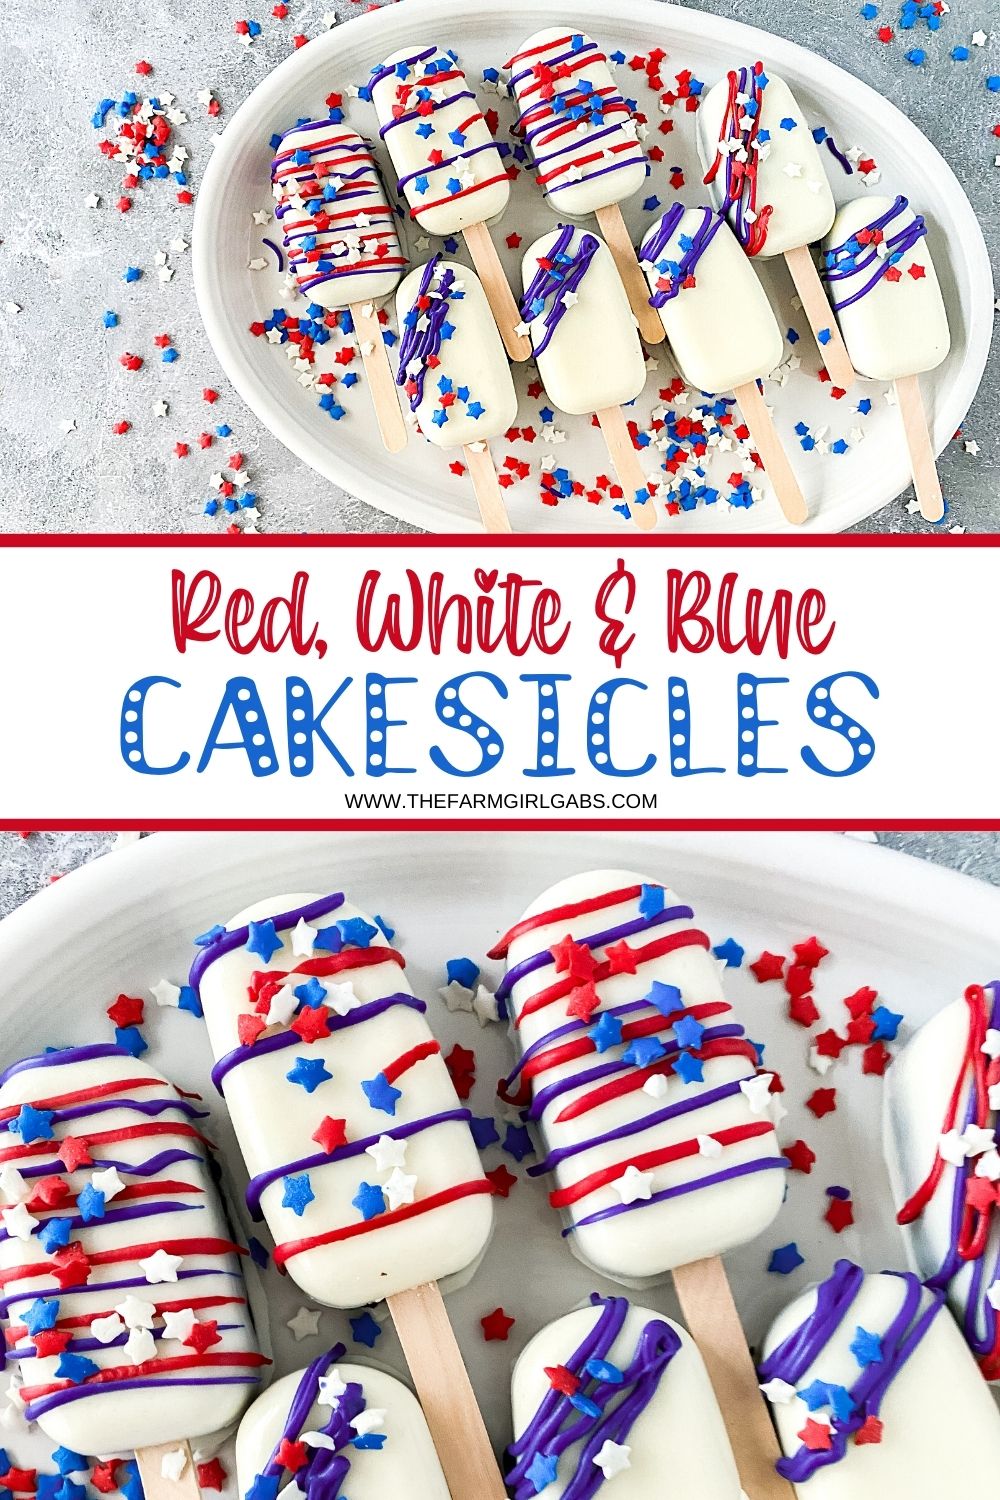

Red, White, and Blue Cakesicles
Feeling festive and looking for the perfect treat to prepare for the holidays? Try these tasty and fun Red, White & Blue Cakesicles that are sure to be a huge hit at any gathering you host with your family and friends. Follow this easy step-by-step guide to teach you how to make your own cakesicles. Try this patriotic dessert for your upcoming party.
Ingredients
- 1 cake pop dough recipe (this is my favorite recipe)
- 1/4 cup colored candy melts, each (white, red & blue)
- Popsicle sticks
- Sprinkles
- Coconut oil or paramount crystals
- Ice Cream Silicone Mold
- Popsicle Sticks
Instructions
- Melt the first color of candy coating per package instructions.
- If it’s too thick add in 1 teaspoon of oil (mixed well) until smooth.
- Pour one spoonful of candy coating into the mold. Spread candy up the sides of the mold. If more chocolate is needed to cover the center do so.
- Slide in the popsicle sticks to the center making sure they are as even as possible.
- Freeze for 15 minutes (no more no less or you risk cracking the chocolate). Place the mold flat in the freezer.
- Remove trays from the freezer, using a small cookie scoop portion out the cake pop dough.
- Press gently into the mold careful not to break the chocolate.
- Cover the back with melted chocolate. Clean up the edges as much as possible.
- Freeze for another 5 minutes so the chocolate is hardened and carefully remove from molds by peeling from the top down.
- To remove from the mold: Very carefully loosen one of the end pieces. Peeling the mold from the top, very carefully peel the entire pop free. Carefully push the sticks up through the mold. Rest on a parchment-lined baking sheet.
- Decorating the top: Melt the red & blue chocolate inside of their respective piping bags. Cut a small hole and draw lines across the top of the cakescicle. Add sprinkles immediately
Let set fully. (about 20-30 minutes) - Troubleshooting: If the stick won’t stay inside the dough, remove it from the mold, dip in melted chocolate and insert into pop. Let set for 10-15 minutes. If the chocolate cracks when removing: Peel the chocolate off, if no cake is in the chocolate remelt it and start over.
- The sides are not fully covered: Dab a bit of the melted chocolate into the exposed areas and let dry.
- Extra chocolate is on the outer rim: Using a pair of clean scissors carefully trim it off.